How to Use GigBill
Quick guides · no fluff
Short paragraphs and screenshots that show you how to navigate the app, in the order you'd use it. The orange ring in each screenshot points to the thing to tap.
Set up your profile

Tap the profile icon in the top-right corner of the dashboard. Fill in your name, email, phone, and address, then save. This info appears in the top-right of every invoice you send.
To edit it later, tap the same icon and update what you need.
Choose your currency
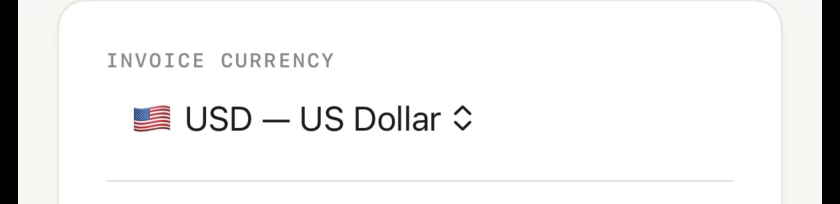
In your profile, tap Invoice Currency and pick the currency you want to bill in. Every new invoice uses the currency selected at the time it's created.
Manual invoicing
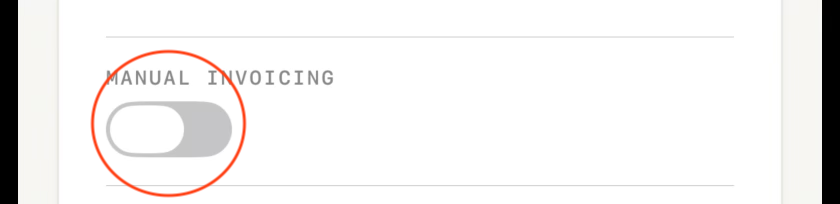
By default, GigBill numbers your invoices automatically (001, 002, 003…). If you'd rather use your own numbering — like INV-2026-001 or a job-based code — turn on Manual Invoicing in your profile.
With Manual Invoicing on, you type the invoice number yourself on every invoice. Turn it off to go back to automatic numbering.
Start a new invoice
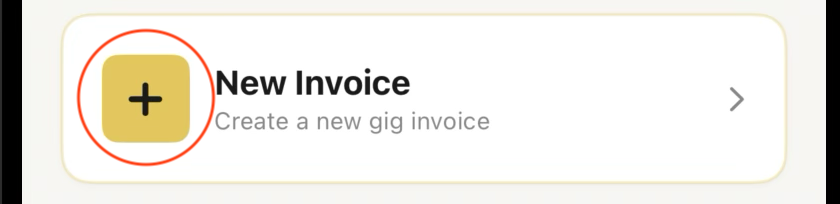
From the dashboard, tap New Invoice. GigBill walks you through three steps: Build the invoice, Review the totals, and Send it.
Each invoice is automatically numbered. You can have as many open invoices as you need — finish one now, come back to another later.
Add the Bill To
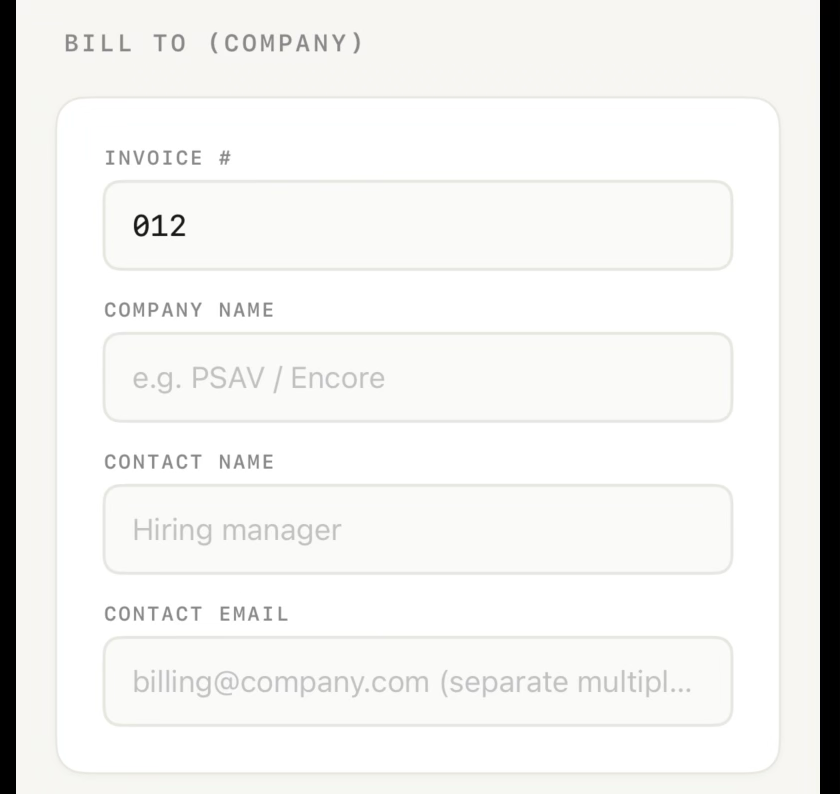
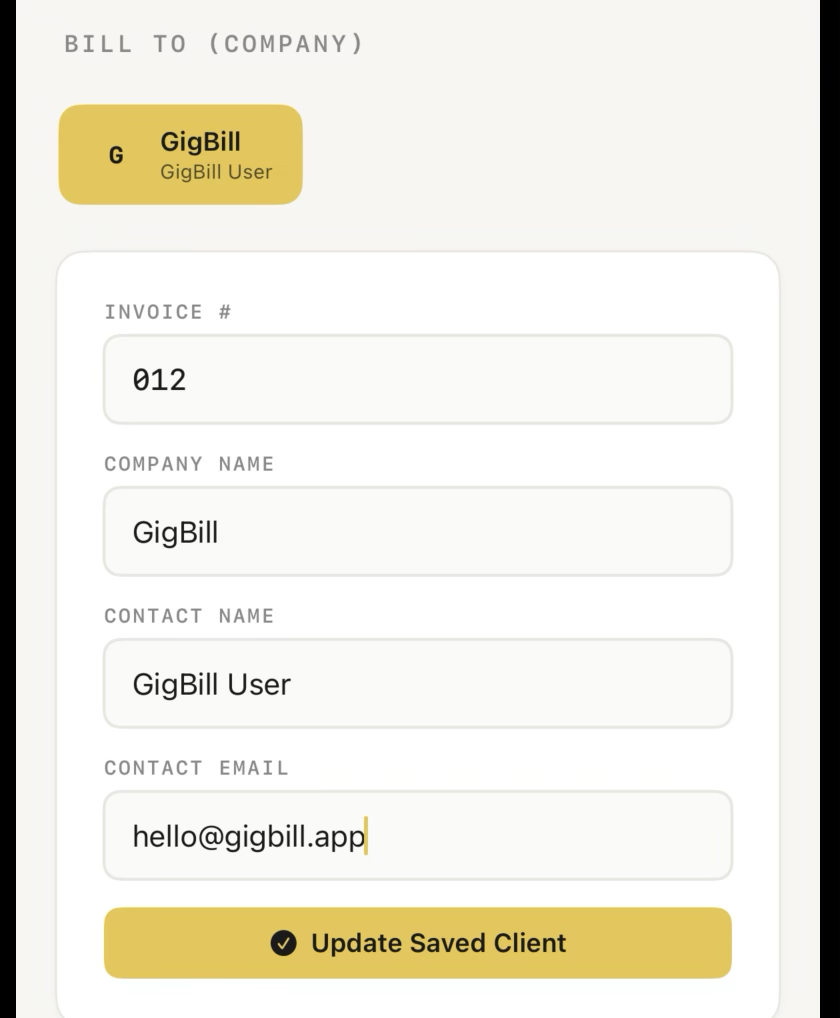
The Bill To is who you're invoicing. Enter the company name, the contact person you're sending the invoice to, and their email. The email is what GigBill uses when you tap Send. You can enter multiple emails separated by commas.
If you've billed this client before, their chip appears above the form — tap it to auto-fill. After editing, tap Update Saved Client to save the changes.
Add a job
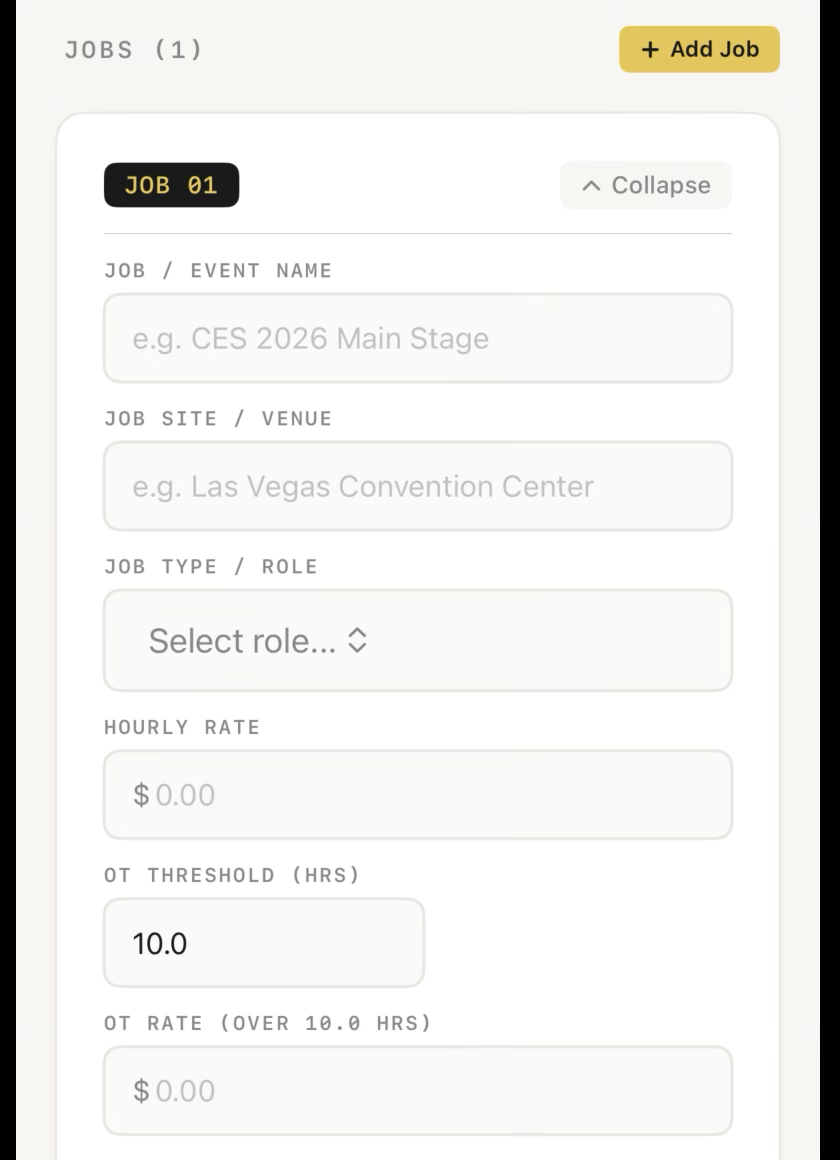
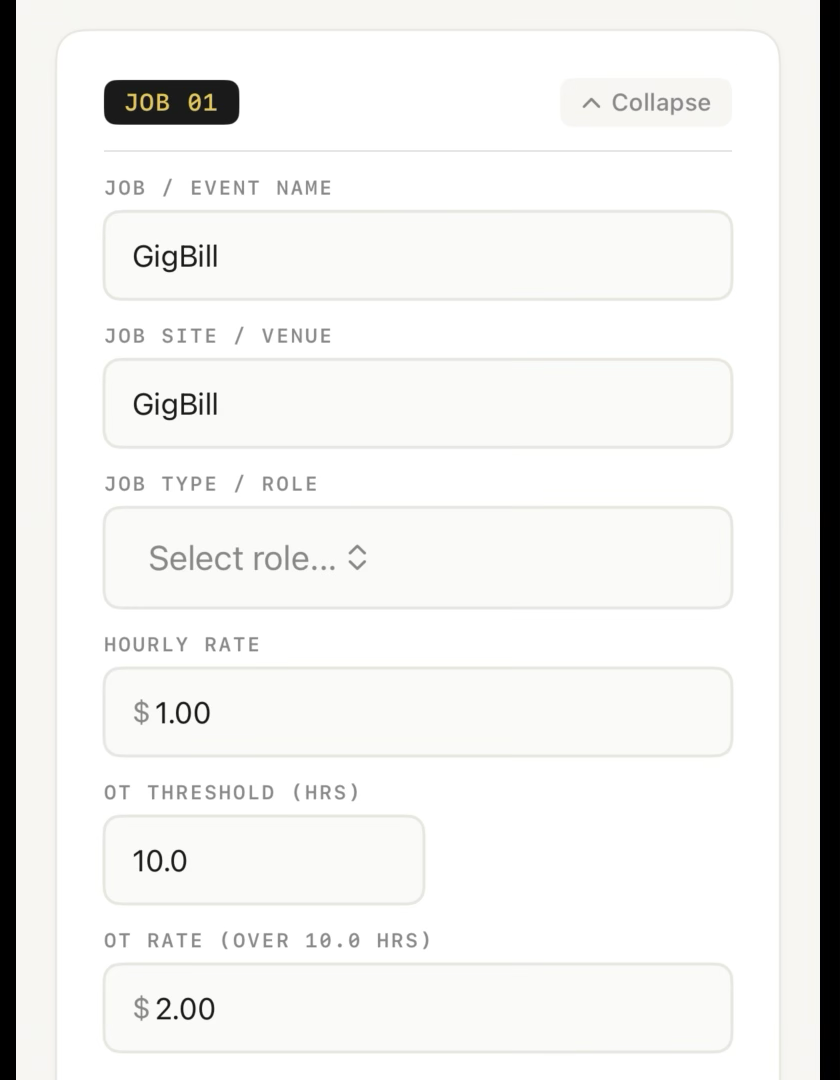
Tap + Add Job. Enter the job or event name, the site or venue, and pick your role. Set your hourly rate, the OT threshold (the hour overtime kicks in), and the OT rate.
You can add as many jobs as you need on a single invoice — each one is billed separately and shows up as its own section on the PDF.
Add a work day
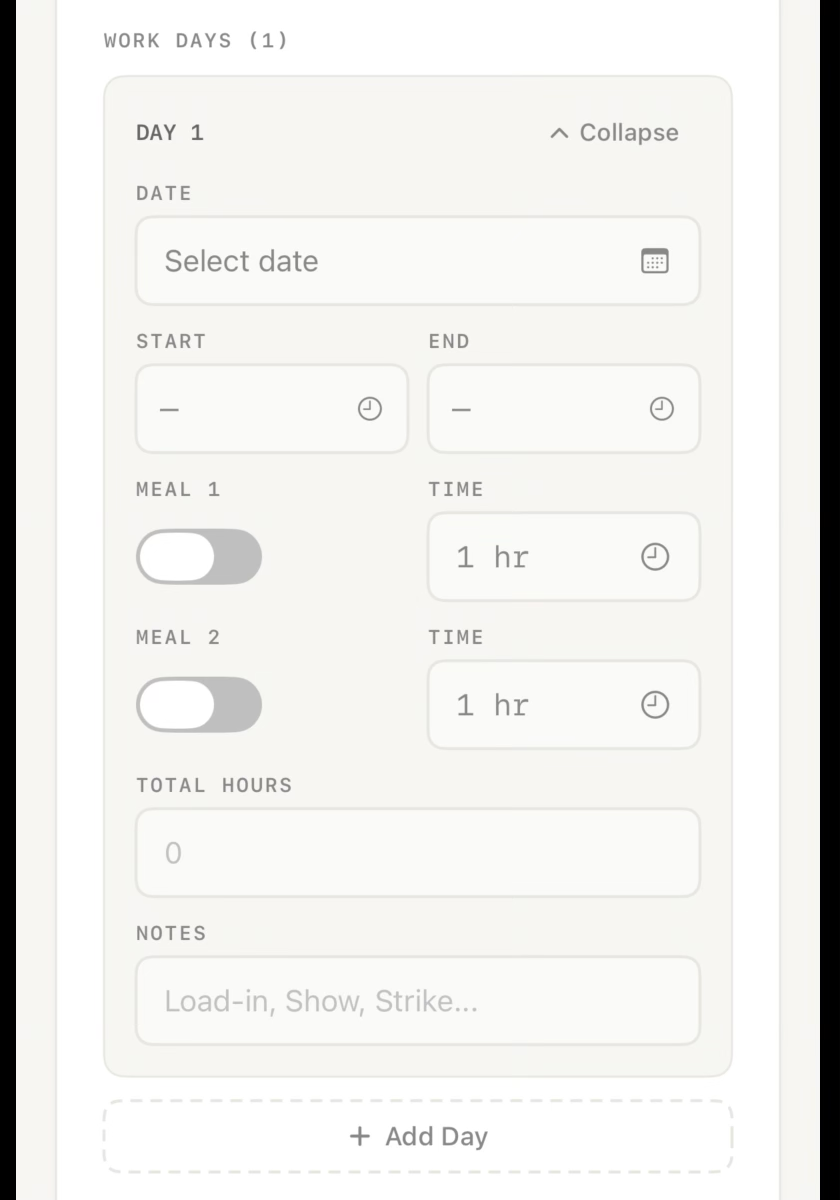
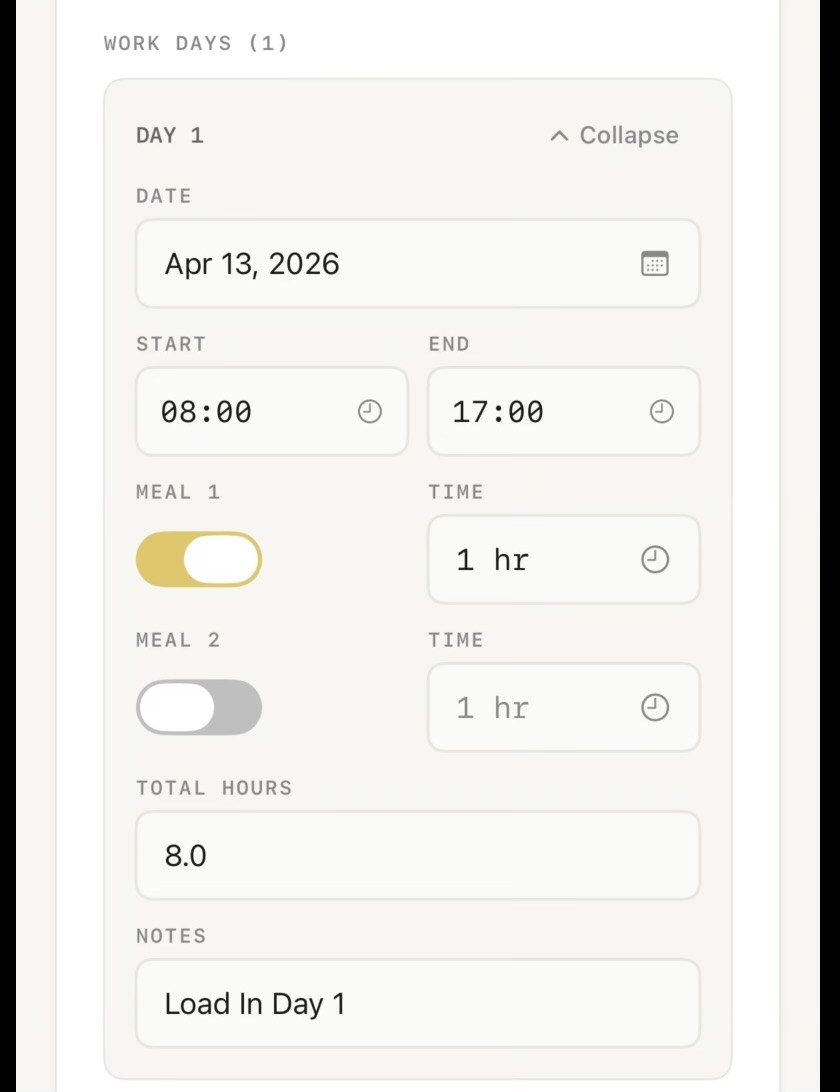
Inside a job, tap + Add Day. Pick the date, then enter your Start and End times. Total hours calculate automatically.
Toggle Meal 1 or Meal 2 on if you took unpaid breaks — the time you set is deducted from your total. Add a note (e.g. "Load-In Day 1") if you want it to appear on the invoice line.
Per Diem
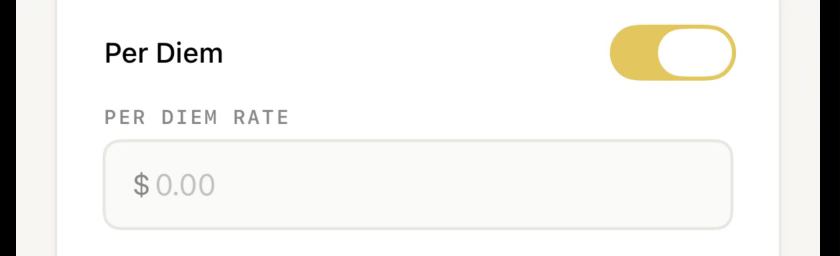
Turn on Per Diem inside any job and set the daily rate. GigBill applies it to every work day in that job and groups it under Expenses on the final invoice — one clean line, no per-day clutter.
Overtime (OT2)
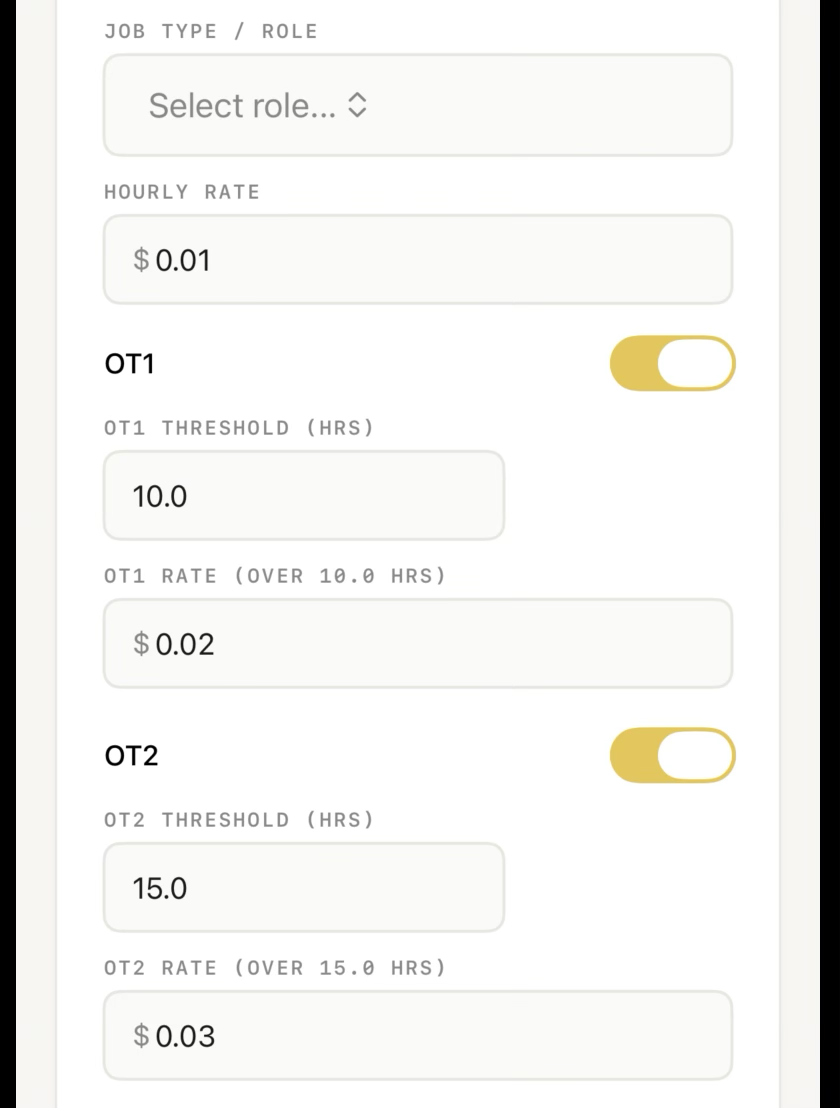
Turn on Overtime (OT2) for jobs with a second overtime tier — like 1.5x past 8 hours, then a higher rate past 12 or 15. Set the OT2 threshold and the OT2 rate.
The OT2 threshold must be above the OT1 threshold. If they're out of order, the field shows in red and won't be applied.
Review the totals
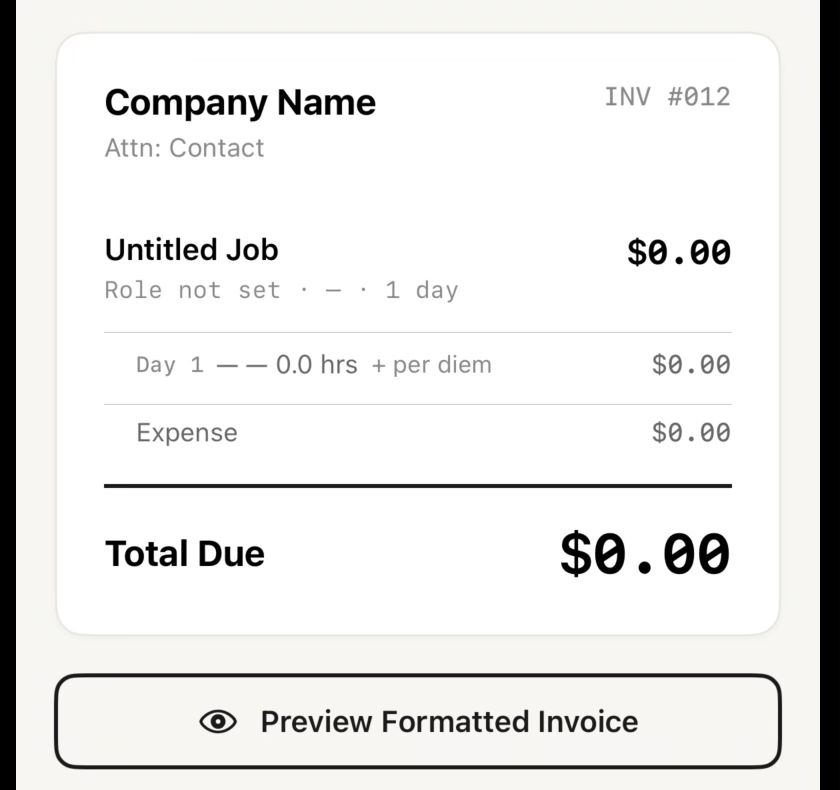
When you're done building, tap Review Invoice → at the bottom to move to step 2. Check the totals: hours, OT1, OT2, per diem, expenses, and grand total.
Tap Preview Formatted Invoice to see exactly what your client will receive. If anything looks off, go back to Build and fix it before sending.
Send the invoice
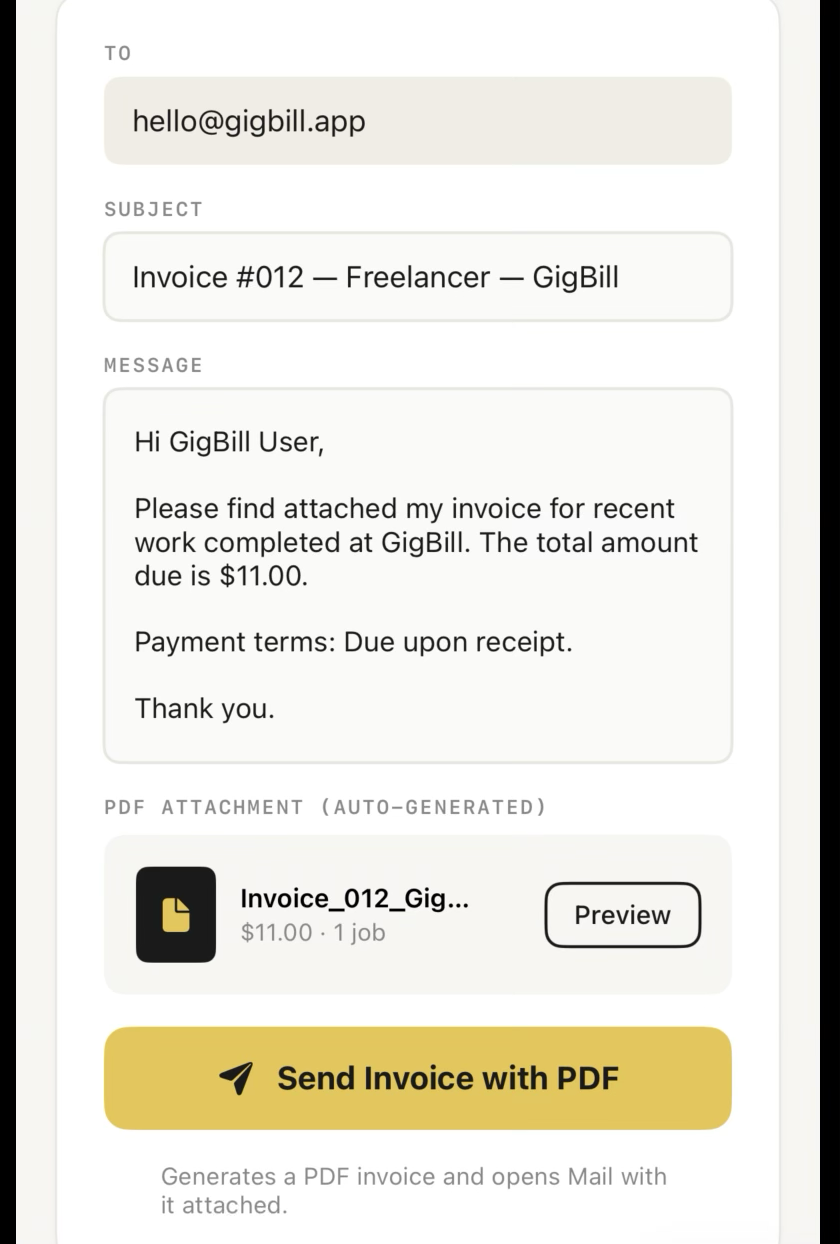
Tap to step 3. The To field is filled in from the Bill To, the Subject and Message are pre-written, and the PDF is auto-attached.
Edit anything if needed, then tap Send Invoice with PDF. GigBill opens your device's Mail app with the invoice attached — review one more time, and hit send.
Still stuck? Email hello@gigbill.app and we'll help.